Intro and history
I’ll take this opportunity to write about a rather old project that I did with veox.
One day, he comes up with a brilliant idea of building a so-called Bitcoin miner using old video cards from eBay. The way I see it, Bitcoin is a technical hack to route around the global banking ponzi scheme. “Mining” is (essentially) lame slang for transaction verification and providing a deterministic money supply. These functions are performed by networked machines. Anyway, veox did the computer hardware part, and asked me to make a case. I also helped him with the power distribution, using these original instructions.
There was a discarded fridge taking up space in our workshop, and pwf suggested we get rid of it, preferably by applying creativity. Thus Frankenstein’s monster came to be. I think I made it in a day or so. There’s no build log.
Neutralise the offender
A few days ago, one of the GPUs started making screechy noises. Sounded like a worn-out bearing. The machine had never gotten a dust cleaning since its inception (and I warned you!..). First step – identify the malfuctioning component.
Finding the noisy card is easy: push down on the fan for a second, it will stop spinning. If the noise is gone, there’s your “broken” part right there. In our case, it was the second from the left.
At this point, I turned the machine off and took it out.
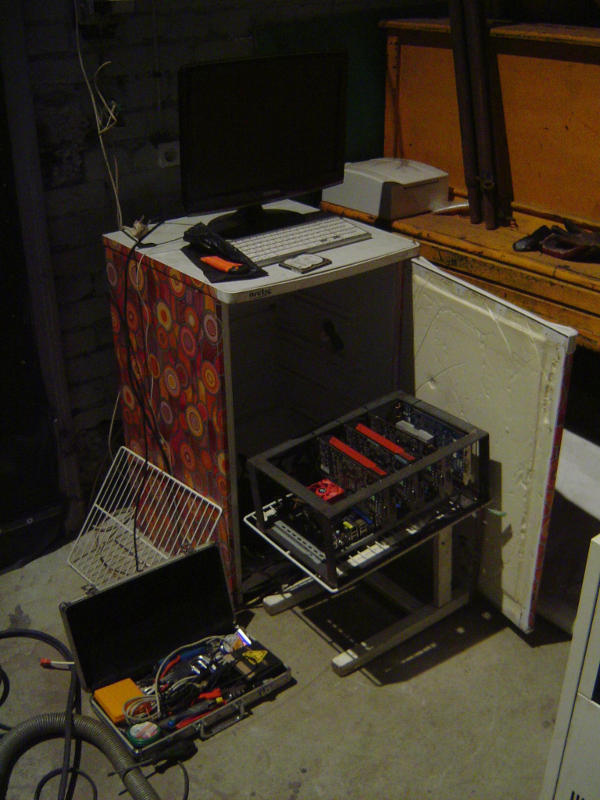
There were originally two shelves and a freezer in the fridge. I took out the freezer and constrained the design so two units could fit in, potentially. One such unit could also fit in a 4U rack mount case, if such a need had ever arisen. It hasn’t, yet.
The briefcase on the left is my take-out electronics service kit. Some vacuum cleaner and compressor hoses are also visible.
Here’s a zoom-in on the unit:
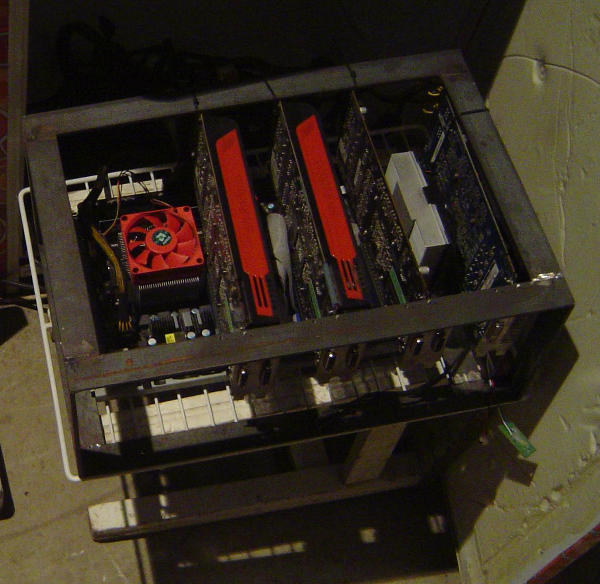
Four ATI Radeon GPUs and a 6-core AMD processor. veox here says that, contrary to popular sentiment, he went for above-minimum CPU power so he could do other things, too, like compile software. He adds it’s been very nice to have one when Primecoin was released. Whatever.
Fridge from the inside, those fans in the back are for additional air flow, scavenged from dead UPSes, and they have to be replaced by now, too:
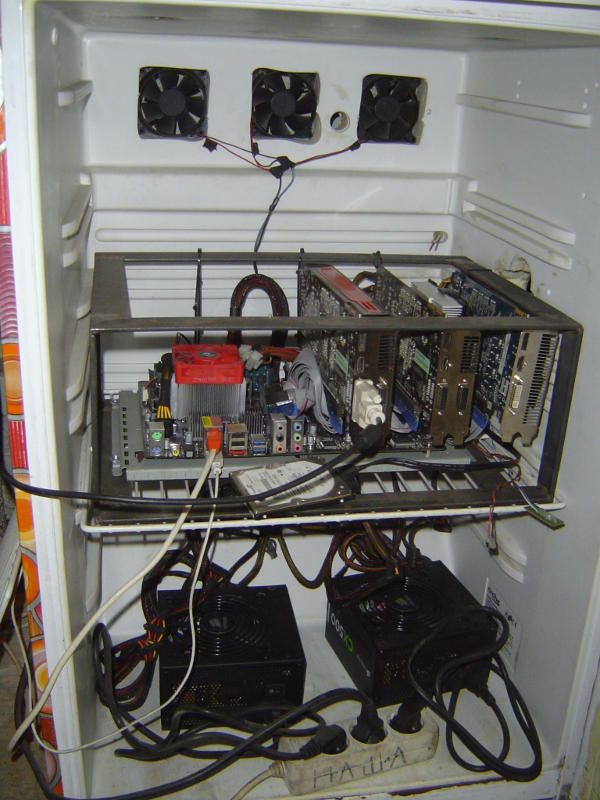
Cyrillic letters say “hasher”. Must be an inside joke.
Radeon 5850 disassembly
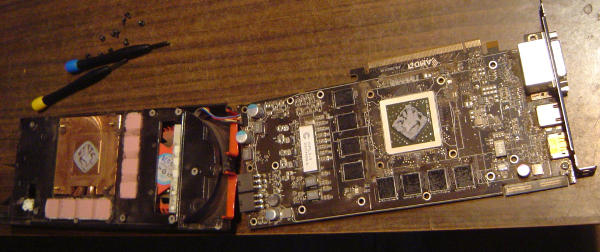
To the point – here’s the GPU:

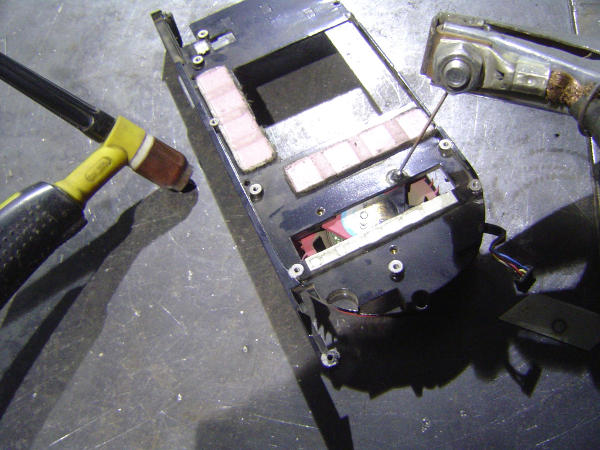
Unscrew 10 largish screws, 4 smaller spring-loaded ones pulling down the heatsink onto the GPU chip, and also 3 small ones on the right side (not visible in the image) that hold together the metal rail and the plastic case, crack it open, and voila!
Detach the fan power connector, unscrew 5 long screws that hold the external plastic and the internal aluminum parts of the case together, unscrew 3 short screws that hold the fan…
Oops, shredded one of them. No biggie, go to the workshop, weld a piece of rod to it with a TIG (15 Amps, DC):
Use that as leverage to unscrew, done!
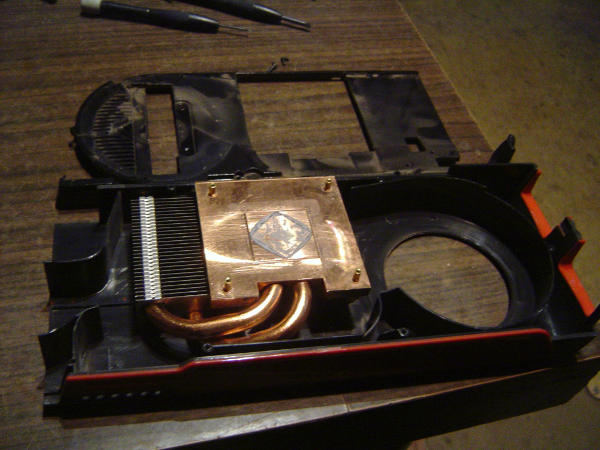
The heatsink is now accessible, a good time to give it (and everything else) 8 bars of nice clean rushing air:
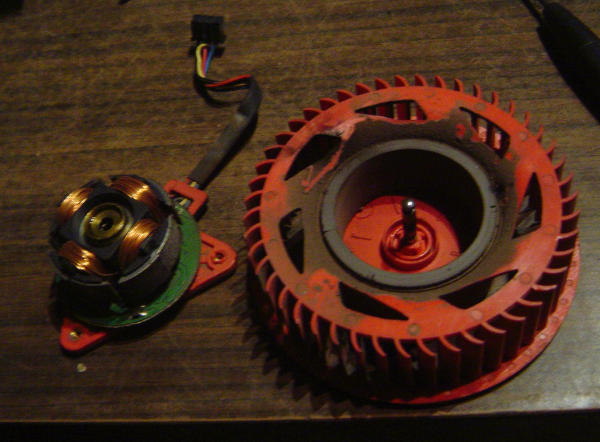
To inspect the fan, one has to know how to triforce:
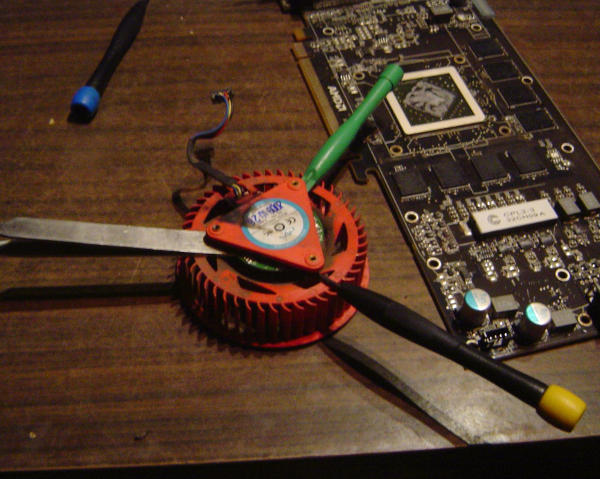
Doesn’t look too bad. Lube it up, push it in, see if you like it.
To put it back together, follow the same steps in reverse. Don’t forget to change the thermal paste where appropriate. (Just in case, it’s appropriate on all chips that have a reflective surface, and those that have paste residue.)
To replace the one screw that got screwed, I salvaged another one from an old hard drive. Actually, I replaced all three, because what the heck.
After powering up, this GPU is still considerably noisier than the other three, but at least the dying sound is gone. Time enough for a replacement to get shipped.
Addendum by veox
- This machine has been mining Bitcoin for a few weeks at most. After that, I switched it to Litecoin, and eventually Primecoin, too.
- We had a bet with rxdtxd, I said he couldn’t write a post on this by the end of the week. Since I lost (obviously), I’ll have to run some BOINC projects on the machine for 24 hours. I bet a week of processing time your ASIC can’t do that. ;)