Manual mode trials
My previous attempts at mechanising coffee bean roasting were unsuccessful, so I slapped on a handle to rotate the drum manually.
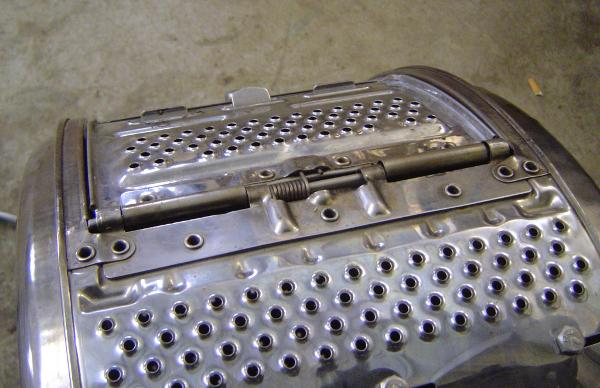
It worked pretty well until I noticed something odd: beans started falling out of the drum, like if there was a hole big enough. I know there weren’t any, at least until I hadn’t put a gas stove under the drum.
Turned out the doors of the drum were attached to its frame with plastic. Plastic! It wouldn’t melt at the measly 90°C inside a washing machine. But it did in my case.
So I took the doors out and continued with the operation, now rocking the handle back and forth at an appropriate speed, so the beans would keep roasting. I later used a propane torch to burn all the plastic out, then washed the drum with water to remove any residue.
It became evident at this point that the 2 RPM motor I intended to use previously would have been too slow, and my coffee would have burned. So fortunate it didn’t work.
Besides all that, it actually requires two people for this mode of operation: one rocking the handle, and one checking if the beans are done, taking a small batch of them out with a spoon and comparing color to the reference.
If I had to continue with the roaster like this, I would have turned those four big screws by the doors around, so they would act as stops, bumping into those “ribs” that hold the device together, preventing the hole which was previously a door from pointing downwards and dumping all the beans directly on top of the stove.
But really, for a lazy engineer like me, all of this was too much physical labour. I took it back to the workshop.
Doors
First thing first, I fixed the doors. That is, I put a 5 mm stainless steel rod and a few bushings in.
The spring that opens the door had to be cut, since ioch damaged half of it while trying to scrape the plastic out. I just burnt it out later, but the spring was already twisted.
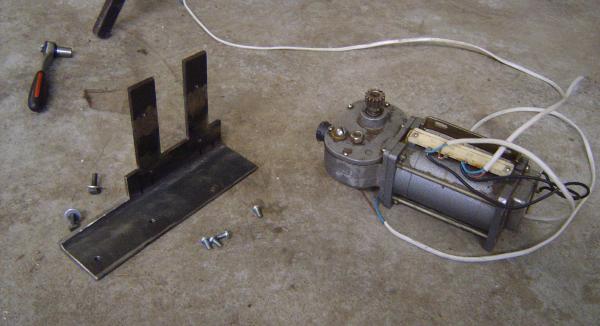
Motor mounting
We also got a new motor: 4,0 W (although looks like 40), 975 RPM, with a reduction gearbox that brings it down to 10 RPM. Solid-core Soviet unobtanium, made in 1979. I cut and tapped a mounting bracket that attaches to the legs with two screws.
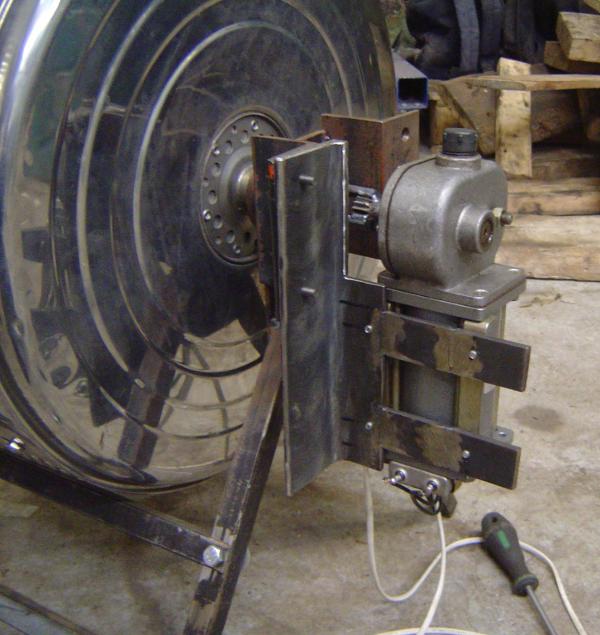
Mounted, it looks like so.
Motor coupling
What I forgot to photograph in the previous post and therefore couldn’t properly explain was how the drum was being rotated. So here’s the catch.
The shaft of the motor had a small steel gear attached to it.
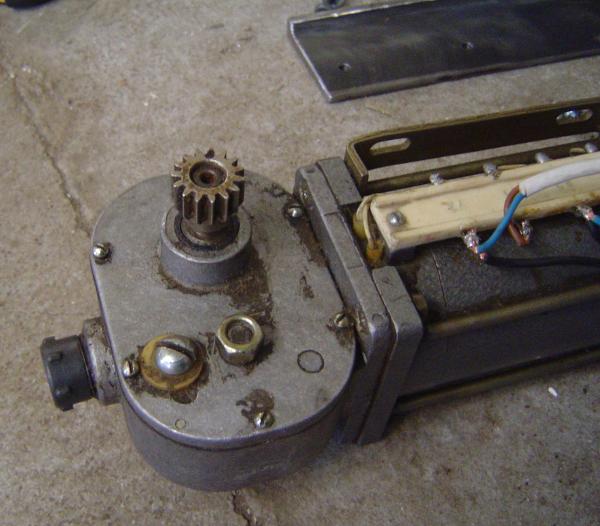
I took it off and welded two thick strips of steel to it.
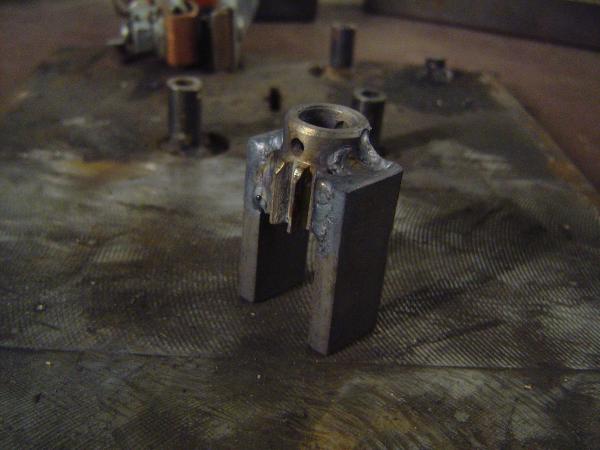
Why would I do that? Here’s why.
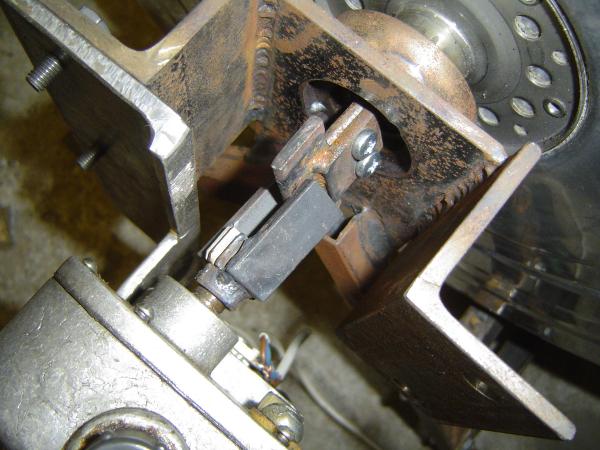
This is how the motor is coupled to the drum. A T-shape is screwed to the axis shaft of the drum, and the motor shaft’s head (modified gear in this case) has a “prong”. As the motor rotates, the prong pushes on the T-shape, forcing the drum to rotate.
This method has a lot of slack, an advantage in this case, since things aren’t perfectly centered. It’s probably been patented by some wanker, too.
The test
There were no coffee beans around this time, so I used a box of screws. It felt something like 1,5 kg. And it worked! The motor spins.
It is still to be tested with real beans, though.